THE SEAMLESS GLUE BONDING PROCESS
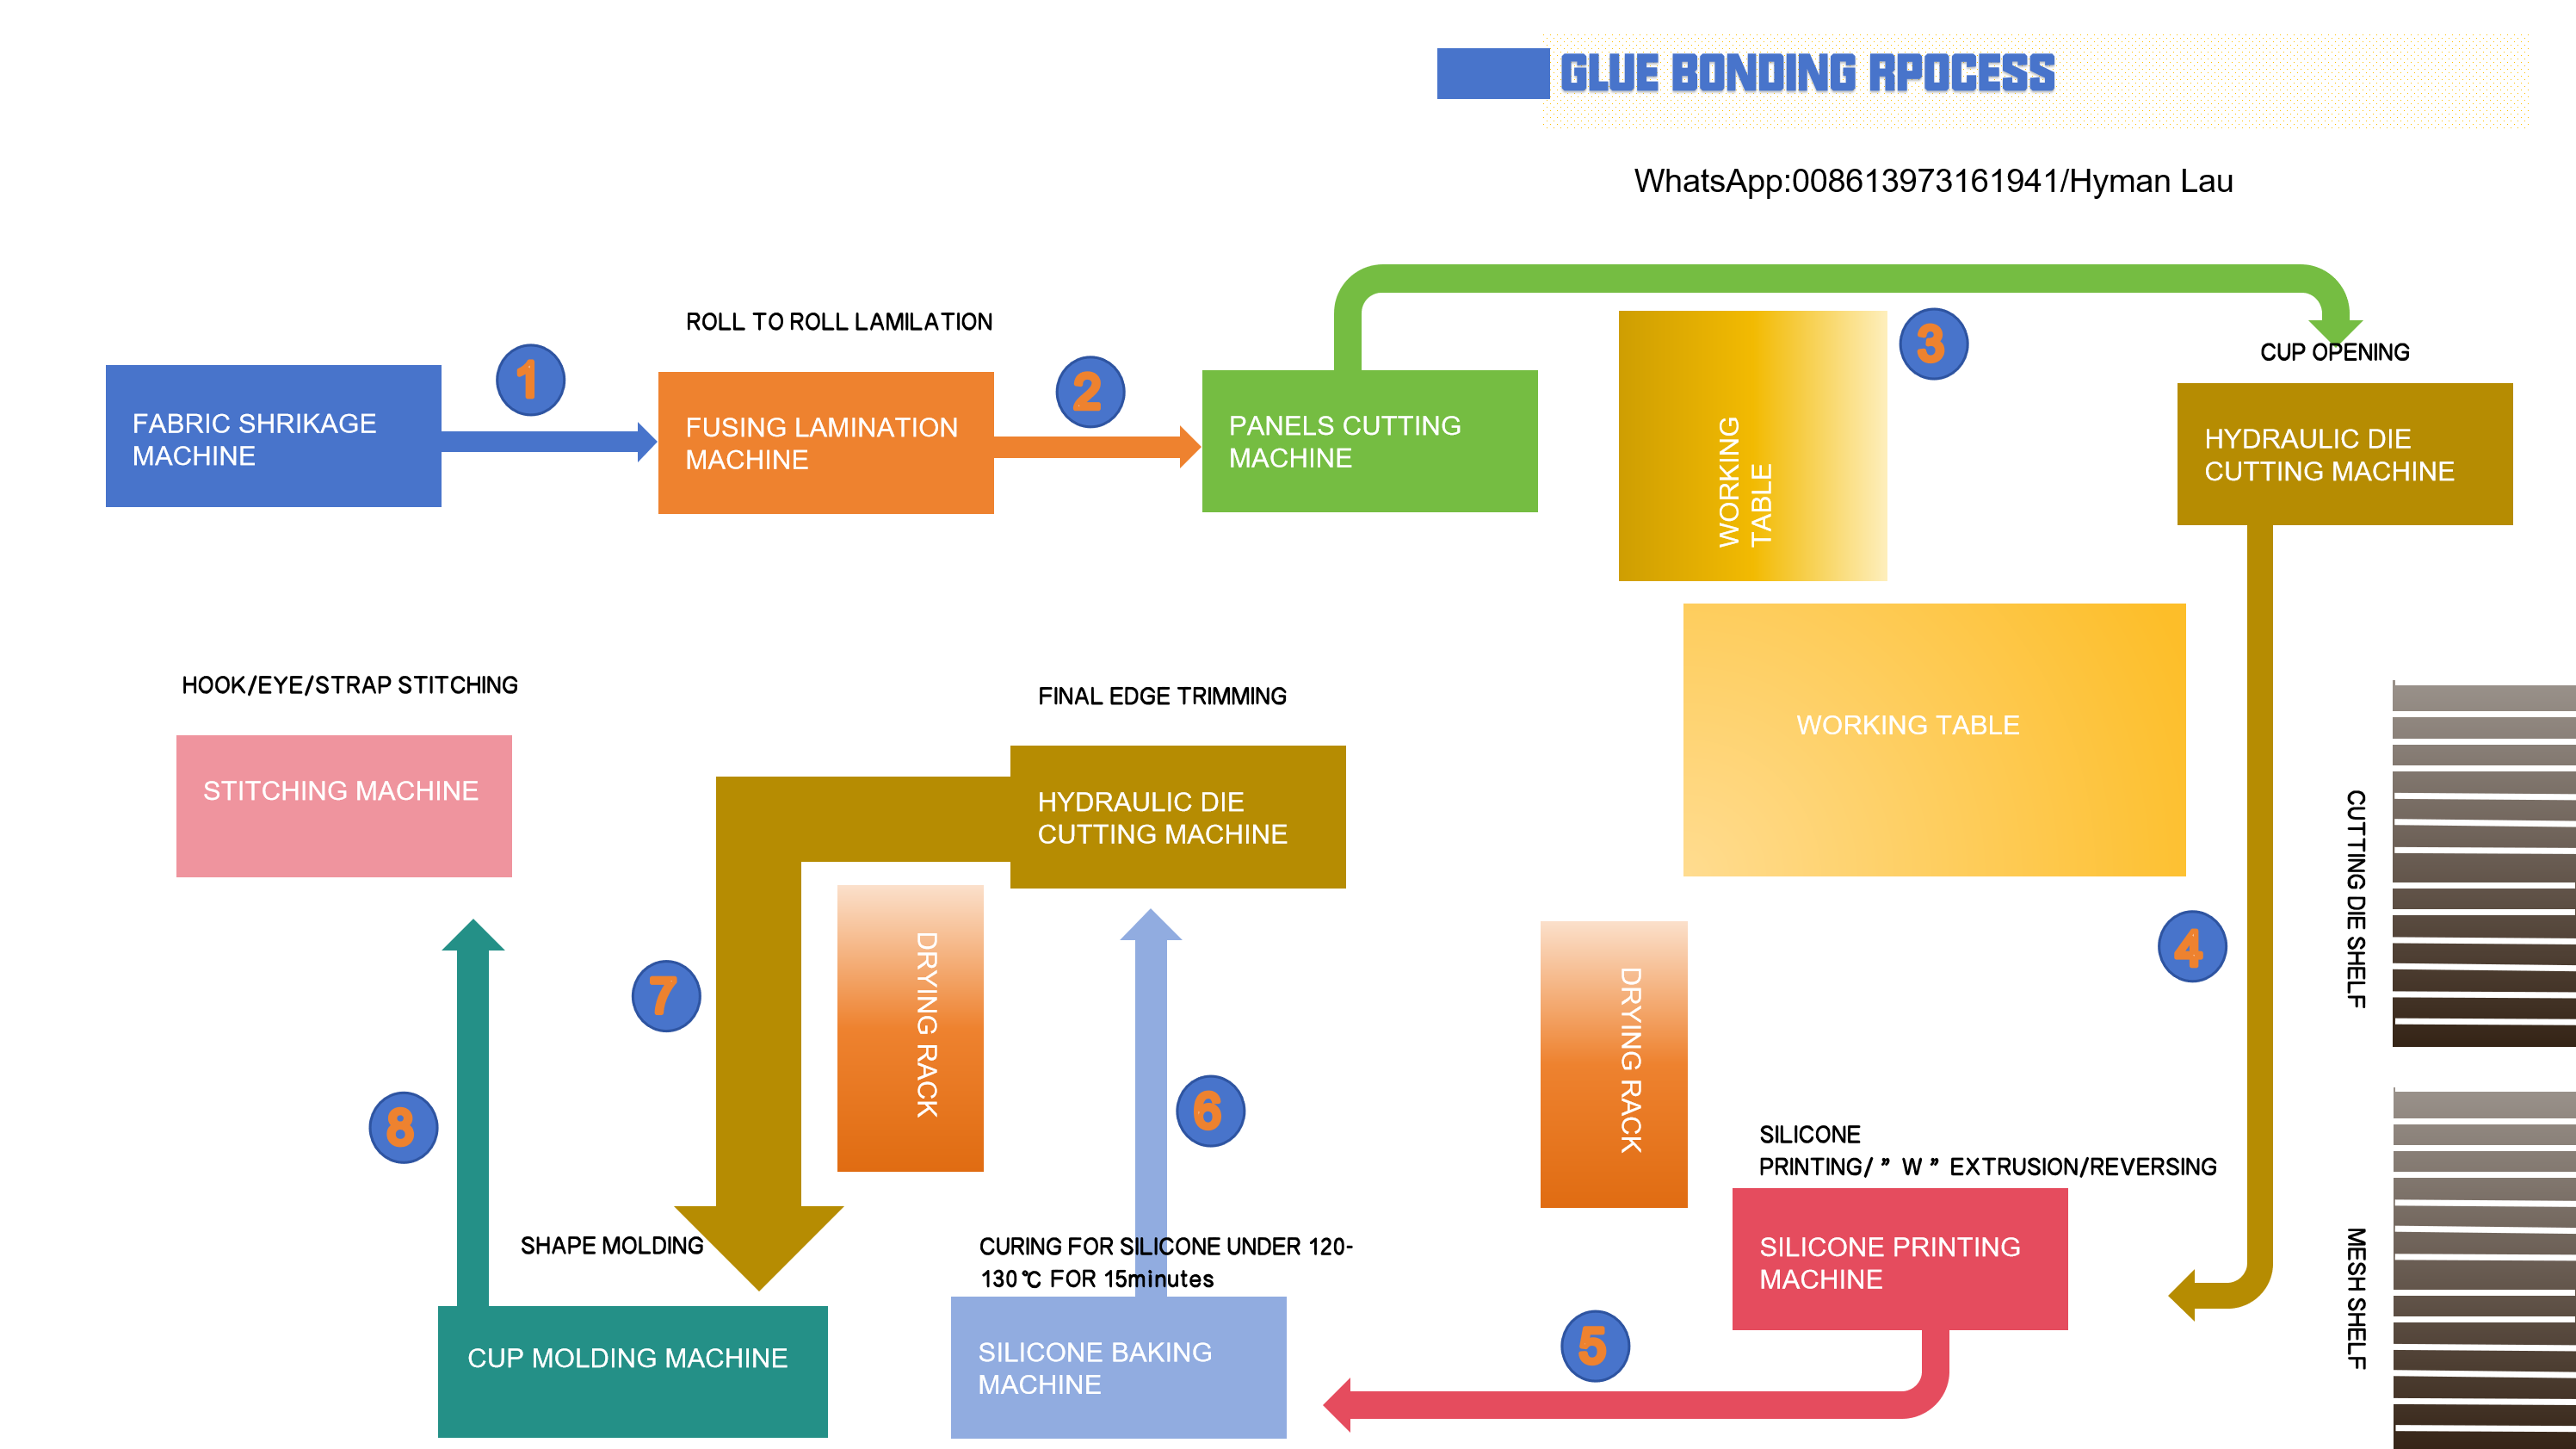
The seamless adhesive bonding process is an advanced bonding technique widely used in industries such as textiles, lingerie, sportswear, and footwear. This seamless adhesive provides excellent bonding strength and elasticity, ensuring a smooth, seamless surface that does not compromise comfort. Below is a detailed description of the nine key steps in this process, from fabric preparation to finished product production.

1. Fabric Shrinkage
Before seamless bonding, the fabric needs to undergo pre-shrinkage treatment to ensure that the finished product remains stable in size during high-temperature bonding and subsequent use, preventing stretching or deformation. The pre-shrinkage process generally includes soaking, stretching, and drying to achieve a balanced state, thus avoiding deformation during bonding or heating.
Fabric Shrinkage Steps:
Soaking: Soak the fabric in warm water to allow natural shrinkage.
Stretching and Drying: Stretch the damp fabric to the desired dimensions and dry it to ensure size stability.
Inspection: Ensure that the fabric retains its original elasticity and softness after shrinkage, making it suitable for seamless bonding.
2. Fusing Lamination Machine
The fusing lamination machine plays a crucial role in the seamless adhesive process. It uses high temperature and pressure to laminate adhesive onto the fabric, accurately bonding multiple layers. The seamless adhesive layer is characterized by its breathability and bonding strength, ensuring a flat surface without visible adhesive marks.
Lamination Machine Operation Steps:
Adhesive Application: Select the appropriate seamless adhesive according to product requirements and apply it evenly to the fabric.
Heat Press Lamination: The fabric and adhesive are combined under high temperature and pressure. Precise control of temperature and pressure prevents adhesive from flowing or seeping through the fabric.
Cooling: After lamination, cool the product to allow the adhesive to set, achieving an ideal seamless bonding effect.
3. Samples Cutting Machine
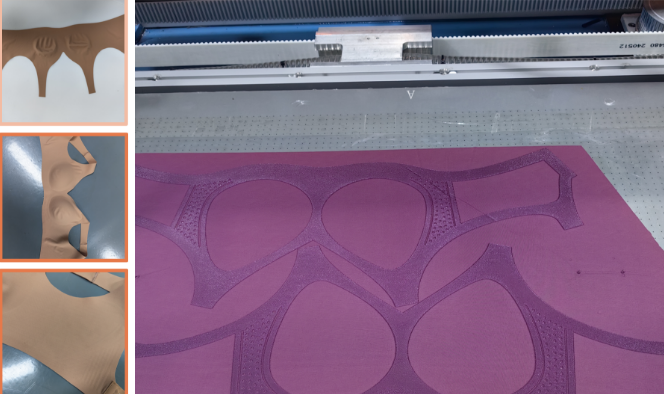
After lamination, use the samples cutting machine for precise cutting. Accurate cutting is essential for consistency and standardization, ensuring that all products are of uniform size. For seamless bonding, high-precision cutting is necessary to avoid edge fraying that may affect bonding quality.
Sample Cutting Steps:
Design Positioning: Position the laminated fabric on the cutting machine according to the design requirements.
Automatic Cutting: The machine cuts in the predetermined shape, ensuring smooth edges.
Sample Sorting: Classify the cut samples and prepare them for the next step.
4. Hydraulic Die Cutting Machine
The hydraulic die-cutting machine is suitable for precise cutting of thick or multi-layered materials. In seamless bonding, the cutting needs to be clean and precise. This machine ensures that all edges are smooth, without burrs that could affect the bonded appearance.
Hydraulic Cutting Operations:
Mold Installation: Install the appropriate mold based on the product size.
High-Pressure Cutting: Use the hydraulic system to apply strong pressure, ensuring uniform shapes for all cuts.
Edge Inspection: Check the edges after cutting to ensure they are smooth, allowing for seamless bonding.
5. Silicone Printing Machine

The silicone printing machine adds functional or decorative silicone patterns to the fabric. This process enhances the visual appeal of the product and can provide additional anti-slip and support functions. For seamless bonding, the silicone layer must be precise and even to maintain a smooth product surface.
Silicone Printing Process:
Template Preparation: Create a silicone printing template based on the design.
Silicone Material Preparation: Choose suitable silicone and adjust color and hardness to meet design specifications.
Printing and Pre-Curing: Print the silicone onto the fabric and pre-cure it in the machine.
W Extrusion/Reversal Printing: If special effects are needed, apply W extrusion or reversal printing techniques to enhance the design.
6. Silicone Baking Machine
The silicone baking machine is used to cure the silicone, ensuring it adheres firmly to the fabric, creating a durable and soft seamless surface. Temperature control during this process is essential to prevent the silicone from yellowing or hardening, which could compromise the seamless bonding effect.
Silicone Baking Steps:
Preheating: Preheat the baking machine to the set temperature to avoid fluctuations.
Curing and Baking: The silicone material is cured at high temperatures, with time adjusted based on material thickness.
Cooling: Cool the silicone after curing, ensuring a smooth, soft pattern that seamlessly bonds with the fabric.
7. Drying Rack
The drying rack is used for cooling and drying the product after silicone printing. The seamless process requires a stable drying environment to ensure even curing of the adhesive, avoiding deformation or dust adherence on the printed and bonded areas.
Drying Process:
Air-Drying: After silicone curing, place the product on a drying rack, allowing natural airflow for drying.
Ventilation and Inspection: Ensure good ventilation and regularly inspect the product for even drying.
Organizing and Sorting: Once dry, organize and classify the product to prevent surface scratches or pressure marks.
8. Cup Molding Machine
The cup molding machine is used to manufacture cup-shaped products, such as bra cups, in the seamless process. During this process, the seamless adhesive ensures a smooth finish that conforms to body contours. Through heat molding, the adhesive layer bonds perfectly with the fabric, providing comfortable support.
Cup Molding Process:
Mold Installation: Install different molds based on product requirements.
Heat Molding: Heat the material and press it into shape in the mold. The adhesive layer sets due to the heat press, bonding seamlessly with the fabric.
Cooling and Shaping: After molding, cool and shape the product to ensure the cup shape remains stable with a seamless surface.
9. Stitching Machine (Hook/Eye/Strap Stitching)
The stitching machine is used to attach hooks, eyes, and straps to the finished product. In seamless bonding, stitching should ensure firm attachment while avoiding extra stitch marks that might disrupt the overall appearance and comfort of the product.
Stitching Process:
Positioning: Accurately position hooks, eyes, and straps in place.
Precise Stitching: Use the stitching machine to securely sew each part, ensuring firm attachment without displacement.
Quality Inspection: After stitching, check the smoothness of the stitching lines to ensure the connections are strong and seamlessly bonded with the fabric.
Summary
The seamless adhesive bonding process emphasizes comfort, smoothness, and aesthetics. From fabric shrinkage preparation, adhesive lamination, sample cutting to product molding and stitching, each step is meticulously designed to ensure a flawless surface on the final product. The seamless adhesive forms a uniform bonding layer through high-temperature curing and pressing, enhancing product durability while meeting consumer demands for high-quality, seamless appearance.